FAQ

The FAQ list can be filtered by the following two categories


This feature requires digitizer mode to be selected for touch driver.

Pleaser follow the below steps to setup your touch to use digitizer mode :

a.) Penmount touch driver is installed already on HMI device
-->1. Remove the touch driver from system.
     2. Restart system aftter drvier is removed.
     3. Reinstall touch driver again into system.
     4. During driver installation stage, the driver will pop up a message with the question to ask you which touch mode you want to use for your touch? (Default is mouse mode)

         touch mode selection

     5. At this point, please select "No" to use gestures mode for your touch.
     6. Continue the installation process until finish.
     7. Your touch has been setup in digitizer mode for use.

b.) New OS w/o Penmount touch driver been installed yet:
--> Start to install touch driver and follow the steps 3-7 items to setup touch driver with digitizer mode.

Step1 : Enter BIOS setup and select Boot Option : UEFI: Built-in EFI Shell


Step2 : change to flash disk(fs0) and enter flash command(fpt.efi –f filename)


Step3 : flash complete

PBT_PU= power button

SLP_S3 = output signal, if system power on, the S3 signal will from Low to High.

                                          If system power off, the S3 signal will from high to low. 


When you used PBT_PU and GND pin, it just like power button, they are the same function for power on and power off.

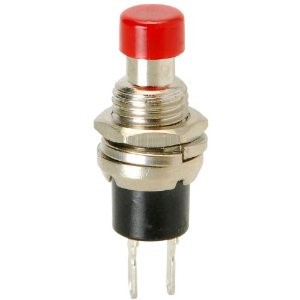
Please use the reset switch button. It will running software shut down action.

This push button will shut down normally when you click it in OS.

If you press the push button about 4 seconds, it will unpowered immediately.


 button


When you used SLP_S3 and GND connect with another device, it will send low (shutdown) or High (power on) signal to the device. 


e.g.:

You connect SLP_S3# with another computer, when you power off the NISE system, the SLP_S3# will switch from high to low signal.

The computer received the low signal from NISE, it can determine how to deal with by itself.

Such as following the NISE to shut down or wake NISE up.

Step1 : Enter BIOS setup and select Boot Option : UEFI: Built-in EFI Shell


Step2 : change to flash disk(fs0) and enter flash command(fpt.efi –f filename)


Step3 : flash complete

This error is for HDMI audio.
If you put a second display via DP to HDMI monitor and if your monitor support HDMI audio, the error x mark will disappeared.

The HDMI3 is an eDP signal, it is unable to do dynamic detection of the HDMI port, it’s a limitation for the HDMI3, the eDP IC will be displayed in the OS as long as it is detected by the system at boot stage.


To install WIN11 on the NISE3900, in addition to enabled TPM2.0 function, you must also enabled the secure boot item in BIOS.

Right click on the Windows icon at the bottom left of the desktop, select “Windows PowerShell(Admin)” to open it.
Enter following command into PowerShell
New-NetSwitchTeam -Name "SwitchTeam01" -TeamMembers "Ethernet","Ethernet 2"
!!
“SwitchTeam01” => The name for the Team "Ethernet","Ethernet 2" => These names must match the name of Ethernet ports in the Windows.

Normally, 1st ethernet port is Ethernet, 2nd ethernet port is Ethernet 2.. and so on. You can check the Ethernet name from "Network Connections"
(Right click on the Windows icon > Internet and Connections > Change adapter options)


Because the HDMI3 is an eDP signal, it is unable to do dynamic detection of the HDMI port, it’s a limitation for the HDMI3, the eDP IC will be displayed in the OS as long as it is detected by the system at boot stage.